

How to Install Kitchen Handles: Complete DIY Guide UK
Upgrading your kitchen doesn't always require a full renovation. Often, the most impactful changes are found in the smallest details. Replacing your old, worn-out hardware with stylish new kitchen handles is one of the most cost-effective ways to breathe new life into your cabinetry. Whether you are looking to modernise a traditional space or add a touch of luxury to a contemporary kitchen, the right hardware acts as the "jewellery" of the room.
For many UK homeowners, the prospect of drilling into pristine cabinet doors can be daunting. However, with the right tools, a bit of patience, and a methodical approach, installing kitchen handles is a DIY project that anyone can master. From choosing between Matt Black handles for a bold statement to selecting Satin Nickel handles for a timeless look, this guide will walk you through every step of the process.
Key Concepts for Handle Installation
Before you start drilling, it is essential to understand the difference between "Centres" and "Overall Length". The centre-to-centre measurement is the distance between the two screw holes, which is the most critical dimension for fitting. Always measure twice and drill once to ensure a professional finish that lasts for years.
Essential Tools for the Job
To achieve a professional result, you need the right kit. Using the wrong screwdriver or a blunt drill bit can damage your new cabinet handles or, worse, splinter your cabinet doors.

Recommended Tool List
- Power drill with adjustable speed settings
- High-quality wood drill bits (usually 4mm or 5mm)
- Phillips or Pozi screwdriver (manual is preferred for final tightening)
- Steel measuring tape and a 300mm ruler
- HB pencil for clear, erasable marking
- Spirit level to ensure horizontal handles are straight
- Masking tape (to prevent wood splintering)
- A handle drilling template (highly recommended for consistency)
Choosing the Right Finish for Your Decor
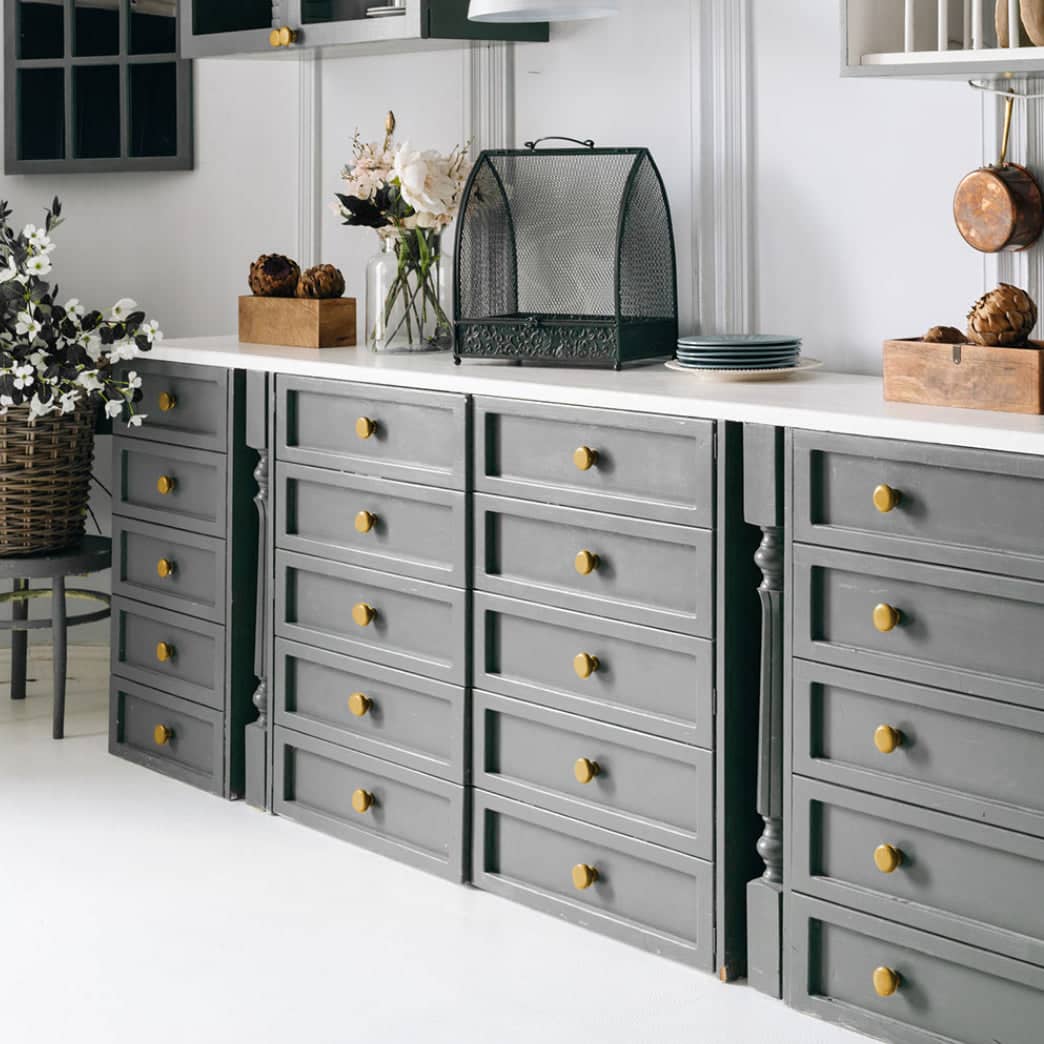
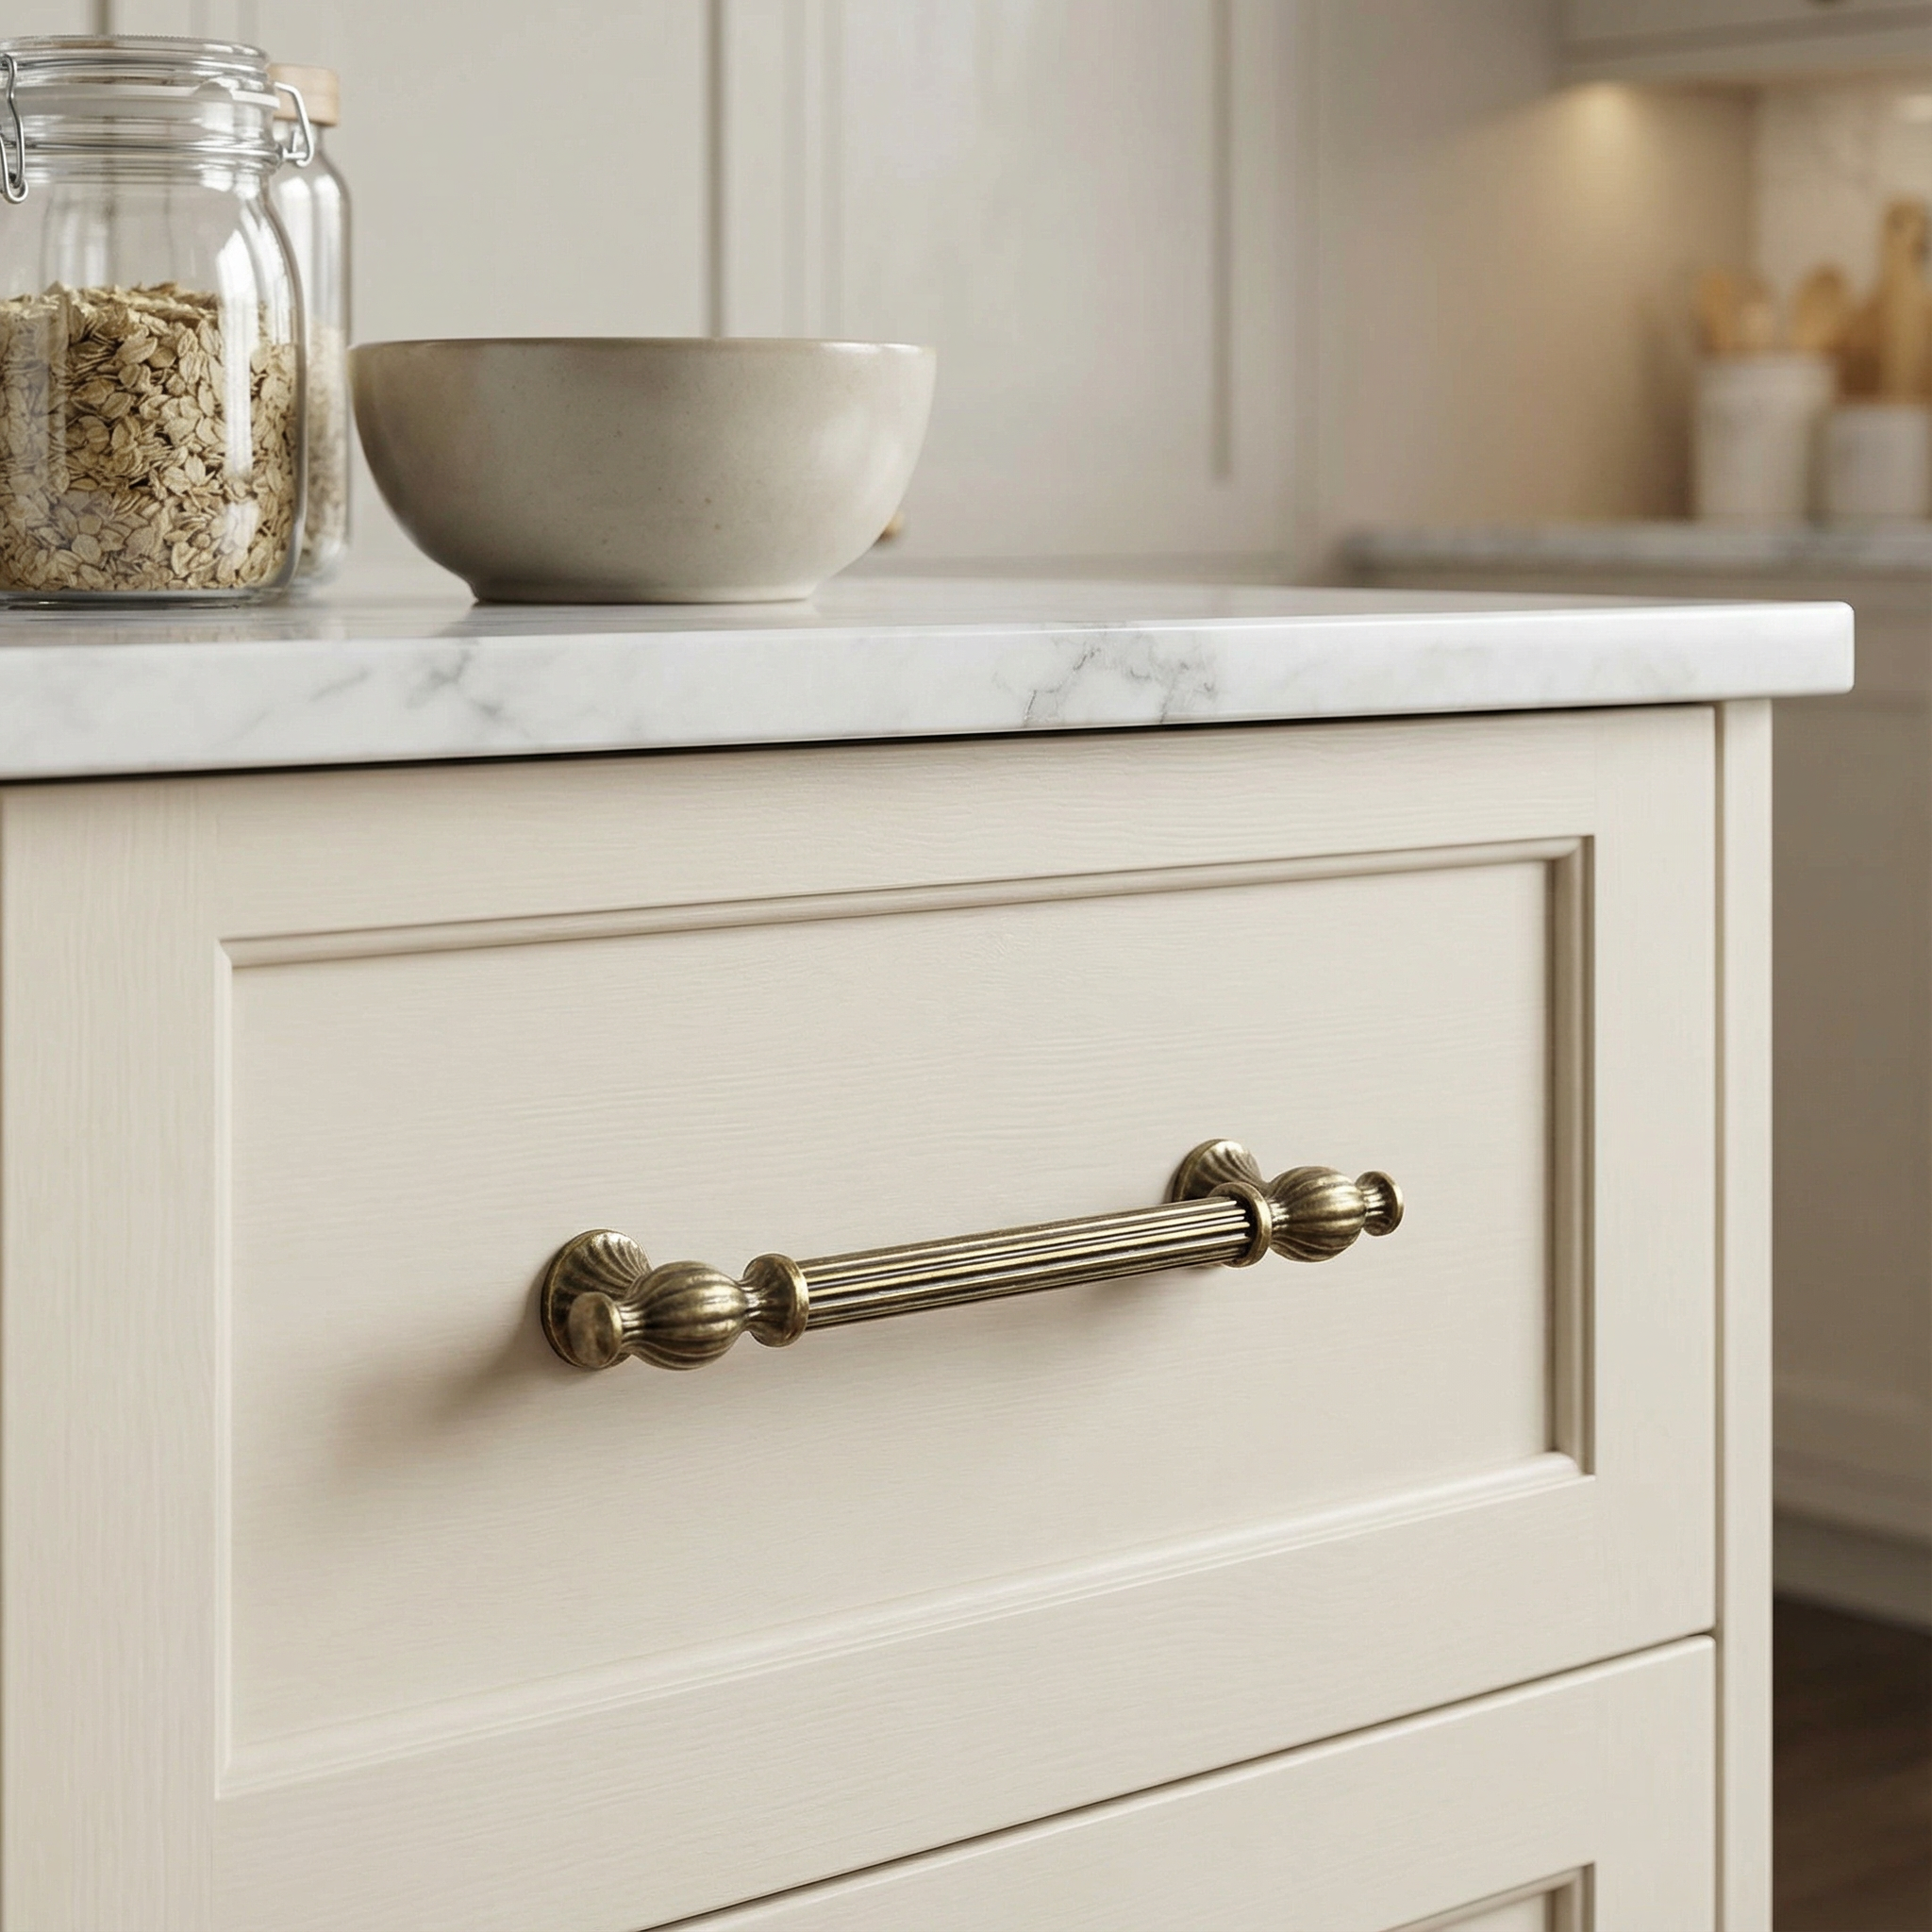
The finish you choose should complement your kitchen's colour palette and your appliances. If you have a traditional kitchen with shaker-style doors, Antique Brass handles or Antique Copper handles provide a warm, lived-in feel. For those seeking a high-end, glamorous aesthetic, Brushed Gold handles or Polished Gold options are incredibly popular in modern UK homes.
If your kitchen features a lot of stainless steel appliances, Brushed Chrome handles or Satin Chrome offer a cohesive, sleek appearance. Alternatively, Satin Black or Matt Black finishes provide a stunning contrast against white or light grey cabinetry.
Measuring and Marking with Precision
The secret to a perfect installation lies in the preparation. If you are replacing existing handles, you must measure the "hole centres"—the distance from the centre of one screw hole to the centre of the other. Common UK sizes include 96mm, 128mm, and 160mm.
Standard Handle Size Guide
When selecting new hardware, ensure the centre-to-centre measurement matches your existing holes if you aren't filling and repainting. Standard increments usually follow: 96mm, 128mm, 160mm, 192mm, and 224mm. For large larder doors, consider longer pulls for better leverage.
If you are installing handles on new doors, you have more freedom. For base units, handles are typically placed in the top corner of the door. For wall units, they are placed in the bottom corner. Drawers usually have the handle positioned centrally, both horizontally and vertically.
The Drilling Process: Step-by-Step
Once you have marked your holes, it is time to drill. This is the stage where most mistakes happen, so take your time.
- Apply Masking Tape: Place a piece of masking tape over the area where you intend to drill. This prevents the drill bit from slipping and protects the surface of the door from splintering as the bit exits the wood.
- Mark the Spot: Mark your drill point clearly on the tape with a pencil. Double-check the distance between the marks against the actual kitchen handles you purchased.
- The Pilot Hole: Use a small drill bit first to create a pilot hole, then follow up with the correct size bit (usually 4mm or 5mm depending on the screw provided).
- Drill Straight: Ensure the drill is perfectly perpendicular to the door. If you drill at an angle, the screw will not line up with the handle thread.
Fitting the Handles
With the holes drilled, remove the masking tape and wipe away any dust. Thread the screws through from the back of the door. Align the handle with the screws and tighten them by hand first to avoid cross-threading.
Use a manual screwdriver for the final tightening. Power drivers can easily over-tighten screws, which may strip the threads inside your beautiful new Brushed Brass handles or cause the screw head to snap off.
Why Quality Hardware Matters
- Durability: High-quality finishes like Polished Chrome or Matt Gold resist tarnishing over time.
- Ergonomics: Well-designed handles from our collection feel comfortable in the hand during daily use.
- Aesthetic Value: Premium finishes like Antique Bronze or Antique Silver add significant perceived value to your home.
- Consistency: Our handles ensure uniform hole centres for easy installation across all your cabinets.
Maintaining Your New Hardware
Once installed, maintaining the look of your bathroom handles or kitchen pulls is simple. Avoid using harsh chemical cleaners or abrasive pads, especially on delicate finishes like Satin Gold or Antique Copper. A soft, damp cloth followed by a dry microfibre cloth is usually all that is needed to keep them looking brand new.
Common Mistakes to Avoid
One of the most frequent errors is failing to account for the "stile" width on Shaker doors. Ensure your handle is centred within the flat panel or perfectly aligned on the frame, depending on your style preference. Another mistake is forgetting to check for internal obstructions; ensure the screw head won't interfere with any internal shelving or drawer runners before you drill.
If you are working in a wet environment, such as a kitchen or near a sink, choosing moisture-resistant finishes like Polished Chrome or Satin Nickel is a wise choice to ensure longevity against steam and splashes.
Transform Your Home Today
Installing new kitchen handles is a rewarding DIY project that offers immediate visual impact. By following these steps and choosing high-quality hardware from DecorAndDecor, you can achieve a professional-standard finish that enhances both the functionality and style of your home. Whether you prefer the modern edge of Matt Black or the classic elegance of Brushed Brass, the perfect handle is waiting to transform your space.
Looking for new handles?
Browse our collection of over 170 handles in 8 finishes, including black kitchen handles, antique brass handles, and chrome handles. Free UK delivery and same day dispatch on all orders.
Read more
Kitchen Handle Sizes Guide: 96mm, 128mm, 160mm, 192mm Explained
Published: 10th February 2026 | Reading Time: 8 minutes | Category: Kitchen Hardware Guides Upgrading your kitchen cabinetry is one of the most effective ways to breathe new life into your hom...
Read more: Kitchen Handle Sizes Guide: 96mm, 128mm, 160mm, 192mm Explained
Kitchen Handle Finishes Explained: Gold, Brass, Chrome, Black & More
Published: 10th February 2026 | Reading Time: 12 minutes | Category: Kitchen Hardware Guides Choosing the right hardware is often described as the "jewellery" of the home. When it comes to a k...
Read more: Kitchen Handle Finishes Explained: Gold, Brass, Chrome, Black & More